Attention
If you are using a screen reader or assistive device, you will most likely find the Print version of this slide set more enjoyable to follow.

Stylin’ With Sass!
Learn how to use Sass to make your CSS styles modular, extendable, and better prepared to fit into modern web site development.
- Network SSID: Student
- Network Password: Improving
Moving Through the Slides
space- move to next slide (over or down)shift+space- move to previous slide (back or up)o- the overview mode
Links
Welcome!
Girl Develop It is here to provide affordable and accessible programs to learn software through mentorship and hands-on instruction.
Some Rules:
- We are here for you!
- Every question is important
- Help each other
- Have fun
Introductions
Instructor
Tamara Temple
Introductions
- Who are you?
- What do you do?
- How did you hear about Girl Develop It?
- How many classes have you taken with GDI?
- What’s your favourite soft drink?
Course Prerequisites and Expectations
- You should know HTML and CSS already
- You should have some basic concepts
of programming:
variables, loops, etc. - You should know how to use the
terminal / command line, including Git. - You should feel comfortable installing
software.
Slack Channel
In the GDIMpls Slack,
join the #html-css-classes channel.
Let's get set up
-
Go to the
Project Files
on GitHub
and read theREADME.mdfile on Github. - Further instructions are available in the project files's wiki
- Read them through completely, then follow the instructions.
Estimating 10 minutes
So, how'd that go?
High Five!
What is Sass?
Sass is a command-line tool
that pre-processes your CSS files
allows you to create:
- modular,
- DRY, and
- more maintainable styles
Sass has two dialects:
- SCSS (Sassy CSS)
- Indented Sass
Indented Form:
nav
  ul
    list-style: none
stripped down, white-space indented, terse;
does not look like CSS (called “Sass”)
Sassy Form:
nav {
  ul {
    list-style: none;
  }
}
keeps all the braces (“squirly brackets”) and
semi-colons that you have in CSS.
White space doesn’t
matter. (called “SCSS”)
Plain CSS is already SCSS, it’s the easiest to start with.
For this course, I’ll be showing you the SCSS dialect.
The printed notes show the Sass version as well.
What does Sass Do?
Compiles!
- Sass takes files written in Sass or SCSS and compiles them into CSS.
- By default, it uses the same file base name.
- For example
styles.scssbecomesstyles.css. - It’s also possible to have different source and destination folders.
This last is really useful for building distributions for your site.
Variables!
Start with SCSS:
$brand-primary: seagreen;
$brand-accent: tomato;
$brand-bg: honeydew;
header {
  background: $brand-bg;
  color: $brand-primary;
}
header a { color: $brand-accent; }
Sass dialect:
$brand-primary: seagreen
$brand-secondary: springgreen
$brand-accent: tomato
$brand-bg: honeydew
header
  background: $brand-bg
  color: $brand-primary

header a
  color: $brand-accent
Get CSS!
header {
  background: honeydew;
  color: seagreen;}
header a {
  color: tomato;}
Sass let’s you set variables that can hold values used all over your css files, allowing you to quick change a commonly used value in only one place.
Variables!
See the Pen Sass does Variables by Tamara Temple (@tamouse) on CodePen.
Nesting!
Start with SCSS:
nav {
  ul {list-style: none; }
  li {display: inline-block; }
  a {text-decoration: none;
    &:hover {text-decoration: underline;}
  }
}
Sass
nav
  ul
    margin: 0
    padding: 0
    list-style: none

  li
    display: inline-block

  a
    display: block
    padding: 6px 12px
    text-decoration: none
Get CSS!
nav ul {
  list-style: none; }
nav li {
  display: inline-block; }
nav a {
  text-decoration: none; }
  nav a:hover {
    text-decoration: underline; }
Sass allows the nesting of CSS so you can clearly tell which rules apply to which parent, without endless repetition.
Nesting!
See the Pen Sass does Nesting by Tamara Temple (@tamouse) on CodePen.
Mixins!
Start with SCSS:
@mixin visually-hidden {
  text-indent: 100%;
  white-space: nowrap;
  overflow: hidden;
}
.image-replace {
  @include visually-hidden;
  background: url(logo.png) no-repeat;
}
or Sass
=visually-hidden
  text-indent: 100%
  white-space: nowrap
  overflow: hidden

.image-replace
  +visually-hidden
  background: url(logo.png) no-repeat
Get CSS!
.image-replace {
  text-indent: 100%;
  white-space: nowrap;
  overflow: hidden;
  background: url(logo.png) no-repeat;
}
Mixins let you specify often repeated style specification that are used in several independent styles. You could consider a mixin like a macro, where the mixin’s content gets included in the style specification.
Mixins!
See the Pen Stylin With Sass: Mixins by Tamara Temple (@tamouse) on CodePen.
Partials!
Start with SCSS
// file: _settings.scss
$primaryBrand: #690067;

// file: styles.scss
@import "settings";
header{background-color: $primaryBrand;}
Sass
// file: _settings.sass
$primaryBrand: #690067

// file: styles.sass
header:
  background-color: $primaryBrand
Get CSS
/* no file _settings.css */

/* file: styles.css */
header{background-color: #690067;}
You can split out your Sass / SCSS declarations into several files to help you keep them all organized. Beginning the file name with the underscore character (‘_’) will tell the Sass preprocessor to ignore the file because it’s being imported and doesn’t need to have it’s own translated CSS file.
Math!
Start with SCSS
$maxReadableWidth: 0.7em * 52;
$spacing: 2em;
.easy-reading {
  max-width: $maxReadableWidth - $spacing * 2;
  margin: 0 auto;
  > div {
    padding: 0 $spacing $spacing $spacing;
    &:first-child {
      padding-top: $spacing;
    }
  }
}
Or Sass
$maxReadableWidth: 0.7em * 52
$spacing: 2em

.easy-reading
  max-width: $maxReadableWidth - $spacing * 2
  margin: 0 auto

  > div
    padding: 0 $spacing $spacing $spacing

    &:first-child
      padding-top: $spacing
Get CSS!
.easy-reading {
  max-width: 32.4em;
  margin: 0 auto; }
  .easy-reading > div {
    padding: 0 2em 2em 2em; }
    .easy-reading > div:first-child {
      padding-top: 2em; }
Math operations include:
Math!
See the Pen Stylin With Sass: Math by Tamara Temple (@tamouse) on CodePen.
Colours!
Start with SCSS
$primaryBrand: MediumBlue;
$secondaryBrand: darken($primaryBrand, 25%);

.site-header {
  background-color: $secondaryBrand;
}
Or Sass
$primaryBrand: MediumBlue
$secondaryBrand: darken($primaryBrand, 25%)
.site-header
  background-color: $secondaryBrand
Get CSS!
.site-header {
  background-color: #00004e; }
Color transformations include:
- darken
- lighten
- opacify
- transparentize
Colours!
See the Pen Stylin With Sass: Colours! by Tamara Temple (@tamouse) on CodePen.
Comments!
There are two types of comments
- ones which are passed through to the CSS
/* */ - and ones which are not
// ...
Start with SCSS
/* Multi-line comments
 * are passed through */
// single line comments are not
body {
  padding: 0; }
or Sass
/* Multi-line comments
  * are passed through
// single line comments are not
body
  padding: 0
End with CSS
/* Multi-line comments
 * are passed through */
body {
  padding: 0; }
Loops!
Start with SCSS
@for $i from 1 through 3 {
  .column-#{$i} {
    width: 2em * $i;
  }
}
or Sass
@for $i from 1 through 3
  .column-#{$i}
    width: 2em * $i
Get CSS!
.column-1 { width: 2em; }
.column-2 { width: 4em; }
.column-3 { width: 6em; }Loops!
See the Pen Stylin With Sass: Loops! by Tamara Temple (@tamouse) on CodePen.
Branches!
Start with SCSS:
$type: monster;
p {
  @if $type == ocean {
    color: blue;
  } @else if $type == matador {
    color: red;
  } @else if $type == monster {
    color: green;
  } @else {
    color: black;
  }
}
or Sass:
$type: monster

p
  @if $type == ocean
    color: blue
  @else if $type == matador
    color: red
  @else if $type == monster
    color: green
  @else
    color: black
Get CSS!
p {
  color: green; }
Branches!
See the Pen Stylin With Sass: Branches by Tamara Temple (@tamouse) on CodePen.
More examples
- Cross-Browser CSS3 Gradients
- Cross-Browser Box-shadow (drop shadow) effects
- Inner Text Shadow effect
- Off-Canvas Responsive Layout
- Codepen.IO has lots and lots of examples.
Section 1: Telling Sass where to find files and where to put them
-
Sass needs to know where to find the files it should compile, and also where to write the compiled files.
-
There is no magic to this, and the little watch script is telling Sass exactly where to pick things up and where to put them down.
The concept of a sass/ source folder and a css/ destination folder
is very common, but you may find other ways to do this. If you do,
your tooling will need to reflect this.
If you look in the gulpfile.js file that is being used by
npm start, you can find the area where the Sass files are being
compiled. Line 11 contains:
gulp.task('sass', function () {which creates the task to compile Sass files. Lines 12 through 16 specify where to look for such files.
   return gulp.src(
       [
           'sass/**/*.scss',
           'sass/**/*.sass'
       ])
Line 22 specifies where to write them.
.pipe(gulp.dest('css'))Since Sass is a pre-compiler, it needs to run before you open your files in the browser (and it will need to be run before you release your files to the public). This will always require some sort of manual or automated step. Using the watcher program here, which is called Gulp, is one way people do this in an automated way. There are several other ways as well.
- command line task runners: Gulp, Grunt, Rake, Make, etc.
- GUI task runners: Codekit, Proces, etc.
- tools that include Sass support: Jekyll, Rails, Webkit
This class is not concerned with such tooling, but it is an important part of using Sass.
You can reuse this setup in other projects by copying the
package.json and gulpfile.js files, and recreating the structure
of the project.
Let’s Develop It!
Exercise 1: Create the Sass Folder
Checkout the exercise 1 branch:
    # Ctrl+C to stop the watcher
git status
git add --all # optional if you haven't made changes
git commit -m done # optional if you haven't made changes


git checkout -b ex.01.start origin/ex.01.start # required
npm install
npm start # to restart the watcher
Follow the exercise instructions in the file
README.md
How’d that go?
Success!
Section 2: Imports and Partials
-
Sass extends the
@importfunction from CSS to create the concept of a partial. -
A partial is a segment of Sass code in a file with a name that begins with an underscore (
_). Such files are treated differently by Sass:-
if a file starts with an underscore, do not compile a separate
.cssfile for it. -
otherwise, compile a
.cssfile
-
for example:
| Source File Name | Destination File Name |
|---|---|
| styles.scss | styles.css |
| _grid.scss | —— |
Importing a partial
When you import the partial, you leave off the leading underscore.
Sass knows how to find the right file.
@import "grid";Let’s Develop It!
Exercise 2: Single CSS file
Stop the watcher (Ctrl-C)
Save your changes and checkout exercise 2:
git status
git add --all
git commit -m done
git checkout -b ex.02.start origin/ex.02.start
npm install
Restart the watcher:
npm startFollow the instructions in the README file
You Got This!
Section 3: Structuring Your Sass
Issue:
How to organize the CSS for
your website in a way that is:
- Correct
- Consistent
- Maintainable
- Performant
Problem:
How to ensure proper specificity
when creating the CSS.

Managing CSS Projects with ITCSS by Harry Roberts, CSS Wizardry
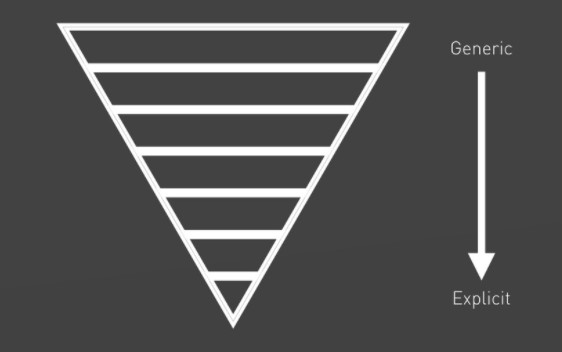
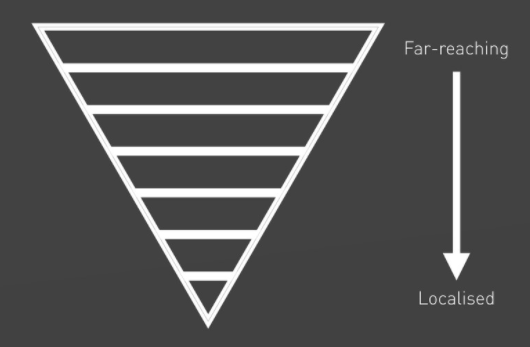
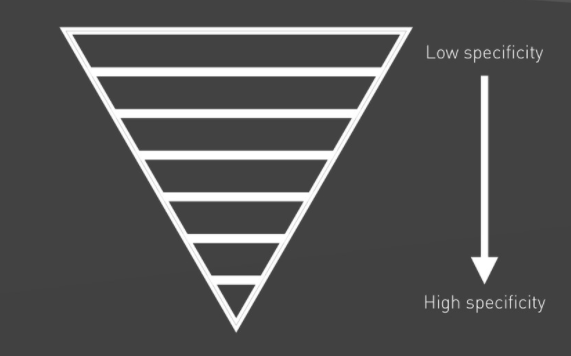
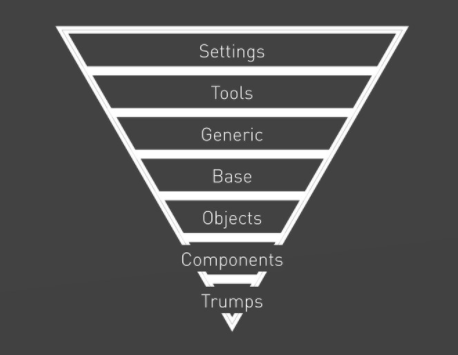
ITCSS
“Inverted Triangle CSS”

Generic to Explicit

Far-reaching to Localized

Low Specificity to High Specificity

Levels

- Settings: global variables, configuration switches, font loading
- Tools: default mixins and functions
- Generic: ground-zero styles such as normalize, resets, box-sizing
- Base: unclassed HTML elements
- Objects: cosmetic-free design patterns
- Components: Designed components, chunks of UI
- Overrides: helpers and overrides (ideally empty) (labeled Trumps in the diagram)
Let’s Develop It!
Exercise 3: Create ITCSS structure
- Stop the watcher:
Ctrl+C - Save your changes for exercise 2:
git add --all && git commit -m done - Pull down exercise 3:
git checkout -b ex.03.start origin/ex.03.start - Follow instructions in the
README.mdfile - Restart the watcher:
npm start
Yeah!
Interlude
Exercises all follow the same basic pattern
-
We’ll be doing a lot of refactoring over the next few Let’s Develp It! sections:
- stop the watcher
Cntl+C - save your past work
git add --all && git commit -m done - checkout the next exercise
git checkout -b ex.NN.start origin/ex.NN.start - restart the watcher
npm start - perform the work in exercise instructions
READMEfile
- stop the watcher
Stretch Break
Section 4: Elements
- Styling Bare HTML Elements, after resets.
- No classes used here, just element selectors
- Can break out into further partials if desired
Let’s Develop It
Exercise 4: Extract Elements
- Branch:
ex.04.start - Instructions:
README.md
Excellent
Section 5: Objects
Finding Objects
- Objects are usually big-ticket items, such as:
- your site’s template (header, footer, main content, sidebars)
- a grid system defining reusable classes for column widths
- other reusable objects such as the classic “Media Object”
Some rules (guidelines)
- don’t use elements for CSS selectors
- don’t use IDs for CSS selectors
- everything is a class
-
using elements as styling selectors breaks the notion of general to explicit specificity. It means you have to design around their use in other contexts.
-
IDs can be used, but don’t use them for CSS; use them for JavaScript and in-page references.
Let’s Develop It
Exercise 5: Page header and footer objects
In this exercise, we’ll extract our first two objects:
- the page header
- the page footer.
Checkout:
- Branch:
ex.05.start - Instructions:
README.md
Section 6: Components
An interlude
upon the naming of classes
Follow along on the printed notes
Naming classes: BEM
“BEM” - Block, Element, Modifier
Block
A functionally independent page component that can be reused.
The block’s name describes its purpose, not its state.
Example
<!-- Correct. The `error` block is semantically meaningful -->
<div class="error"></div>

<!-- Incorrect. It describes the appearance -->
<div class="red-text"></div>
The block shouldn’t influence its environment, meaning you shouldn’t set the external geometry (padding or boundaries that affect the size) or positioning for the block.
Blocks can be nested inside each other, and there can be any number of nesting levels.
Element
A composite part of a block that can’t be used separately from it.
Again, the element’s name describes its purpose, not its state.
The structure of the element name is:
block-name__element-name
The defining part of the element name is the double underscore (__)
separating the block name from the element name.
Example
<!--
    Correct. The structure of the full element name follows the pattern:
    `block-name__element-name`
-->
<form class="search-form">
    <div class="search-form__content">
        <input class="search-form__input">

        <button class="search-form__button">Search</button>
    </div>
</form>

<!--
    Incorrect. The structure of the full element name doesn't follow the pattern:
    `block-name__element-name`
-->
<form class="search-form">
    <div class="search-form__content">
        <!-- Recommended: `search-form__input` or `search-form__content-input` -->
        <input class="search-form__content__input">

        <!-- Recommended: `search-form__button` or `search-form__content-button` -->
        <button class="search-form__content__button">Search</button>
    </div>
</form>
Elements can be nested inside each other, and you can have any number of nesting levels. But, and element is always part of a block; you cannot define a hierarchy of elements.
Thus something like block__elem1__elem2 would be considered
incorrect.
Modifier
An entity that defines the appearance, state, or behaviour of a block or element
The modifer is where the majority of the style settings will end up,
usually. The naming convention varies for modules, a lot of people
seem to use the double-dash convention (--): block_name--size.
Example
Using double-dash modifiers.
<form class="form form--login form--theme_forest">
    <input class="form__input">
    <input class="form__submit form__submit--disabled">
</form>
.form {}
.form--theme_forest {}
.form--login {}
.form__input {}
.form__submit {}
.form__submit_disabled {}Let’s see this done in SCSS:
.form {
    &--theme_forest {}
    &--login {}
    &__input {}
    &__submit {
        &--disabled {}
	}
}
And in Sass:
.form
  &--theme_forest
  &--login
  &__input
  &__submit
&--disabledLet’s Develop It
Exercise 6: Nesting and Refactoring
- Branch:
ex.06.start - Instructions:
README.md
Whew!! That was a tough one.
Give yourselves a hand.
Section 7: Card Component
- Cards are very common components on websites today
- You see them on Facebook, Twitter, Google+, Instagram, Tumblr, and tons of other places
- We’re going to make a card that will feature each of our ladies
Let’s Develop It!
Exercise 7: Famous Person Card
- Branch:
ex.07.start - Instructions:
README.md
How did that go?
Section 8: The Jump Component
Let’s Develop It
Exercise 8: The Jump Component
- Branch:
ex.08.start - Instructions:
README.md
Yay?
Interlude
We’ve been going pretty steady, but now we’re about to dive into more complex things, and stuff that requires some careful thought.
Section 9: The Feature Section
- On our page, there are 3 big globs of space that are denoted by
<section>elements. - The have some common features and some disparate features.
- We can create a component for the common features, and reuse it for each section.
- We’ve already created a separate component for the interior structure in the famous women section.
- We can also create a separate component for the interior structures in the other two sections.
Let’s Develop It!
Exercise 9: Feature Section
(Including interior components)
- Branch:
ex.09.start
Way to go!
Section 10: Theming
Now we’re gonna have fun!
- Theming is one of the coolest things, because with just a couple changes, you can completely change the look of your site.
- It requires extracting colors from the existing elements, objects, and components, and creating modifiers that can easily be applied that affect the color theme.
- In addition to colors, fonts are often another area of theming.
Let’s Develop It!
Exercise 10: Themes
- Branch
ex.10.start
Awesome!
Section 11: Clean Up
- As we’ve gone along, we’ve tried out a couple different ways of organizing our styles.
- Let’s clean that up, and put things into subdirectories.
- A common convention is to name the “collector” or “exporter” file in
the directory “_index.scss”.
- this file imports the other files in the directory.
Let’s Develop It!
Exercise 11: Clean Up
- Branch:
ex.11.start
Whew! We made it.
Postlude
Do you need to use Sass?
No, you don’t.
- CSS variables are becoming available
@importworks in plain old CSS- You can write everything out, especially using BEM, as flat classes
but you still probably want to
- Compiling can reduce load (less of a consideration with HTTP/2)
- Lose things like math, colour functions, self-defined functions, mixins, extensions, nesting, conditionals
- Increases redundancy, non-DRY implementations
Further Reading
The Future: CSS Variables
Something new that’s being introduced are CSS variables.
Please fill out the workshop survey at: tinyurl.com/GDIMpls
Use “Stylin With Sass” as the class name